Jekyll 기반 Github Pages와 Notion Page 연동
For the English version of this post, see here.
개요
최근에 Notion과 Next.js를 연동하여 Notion Page를 자동으로 import 해주는 블로그 템플릿을 제공하는 흥미로운 Repository를 발견하였다.
다만, 지금 블로그가 내가 선호하던 디자인에 더 가까웠기에 지금 블로그에 해당 기능을 추가하기로 결정했다.
평소에는 Notion에 작성한 후에 Markdown으로 뽑고 살짝 수정을 거쳐서 블로그에 업로드 했었는데, 지금은 Notion에 작성만 하면 알아서 블로그에 업로드 되서 아주 간편하다.
기존에 Jekyll과 Notion을 연동한 내용을 담은 블로그 글이 있길래 해당 블로그를 참고해서 개발하였다.
완성본은 다음과 같다.
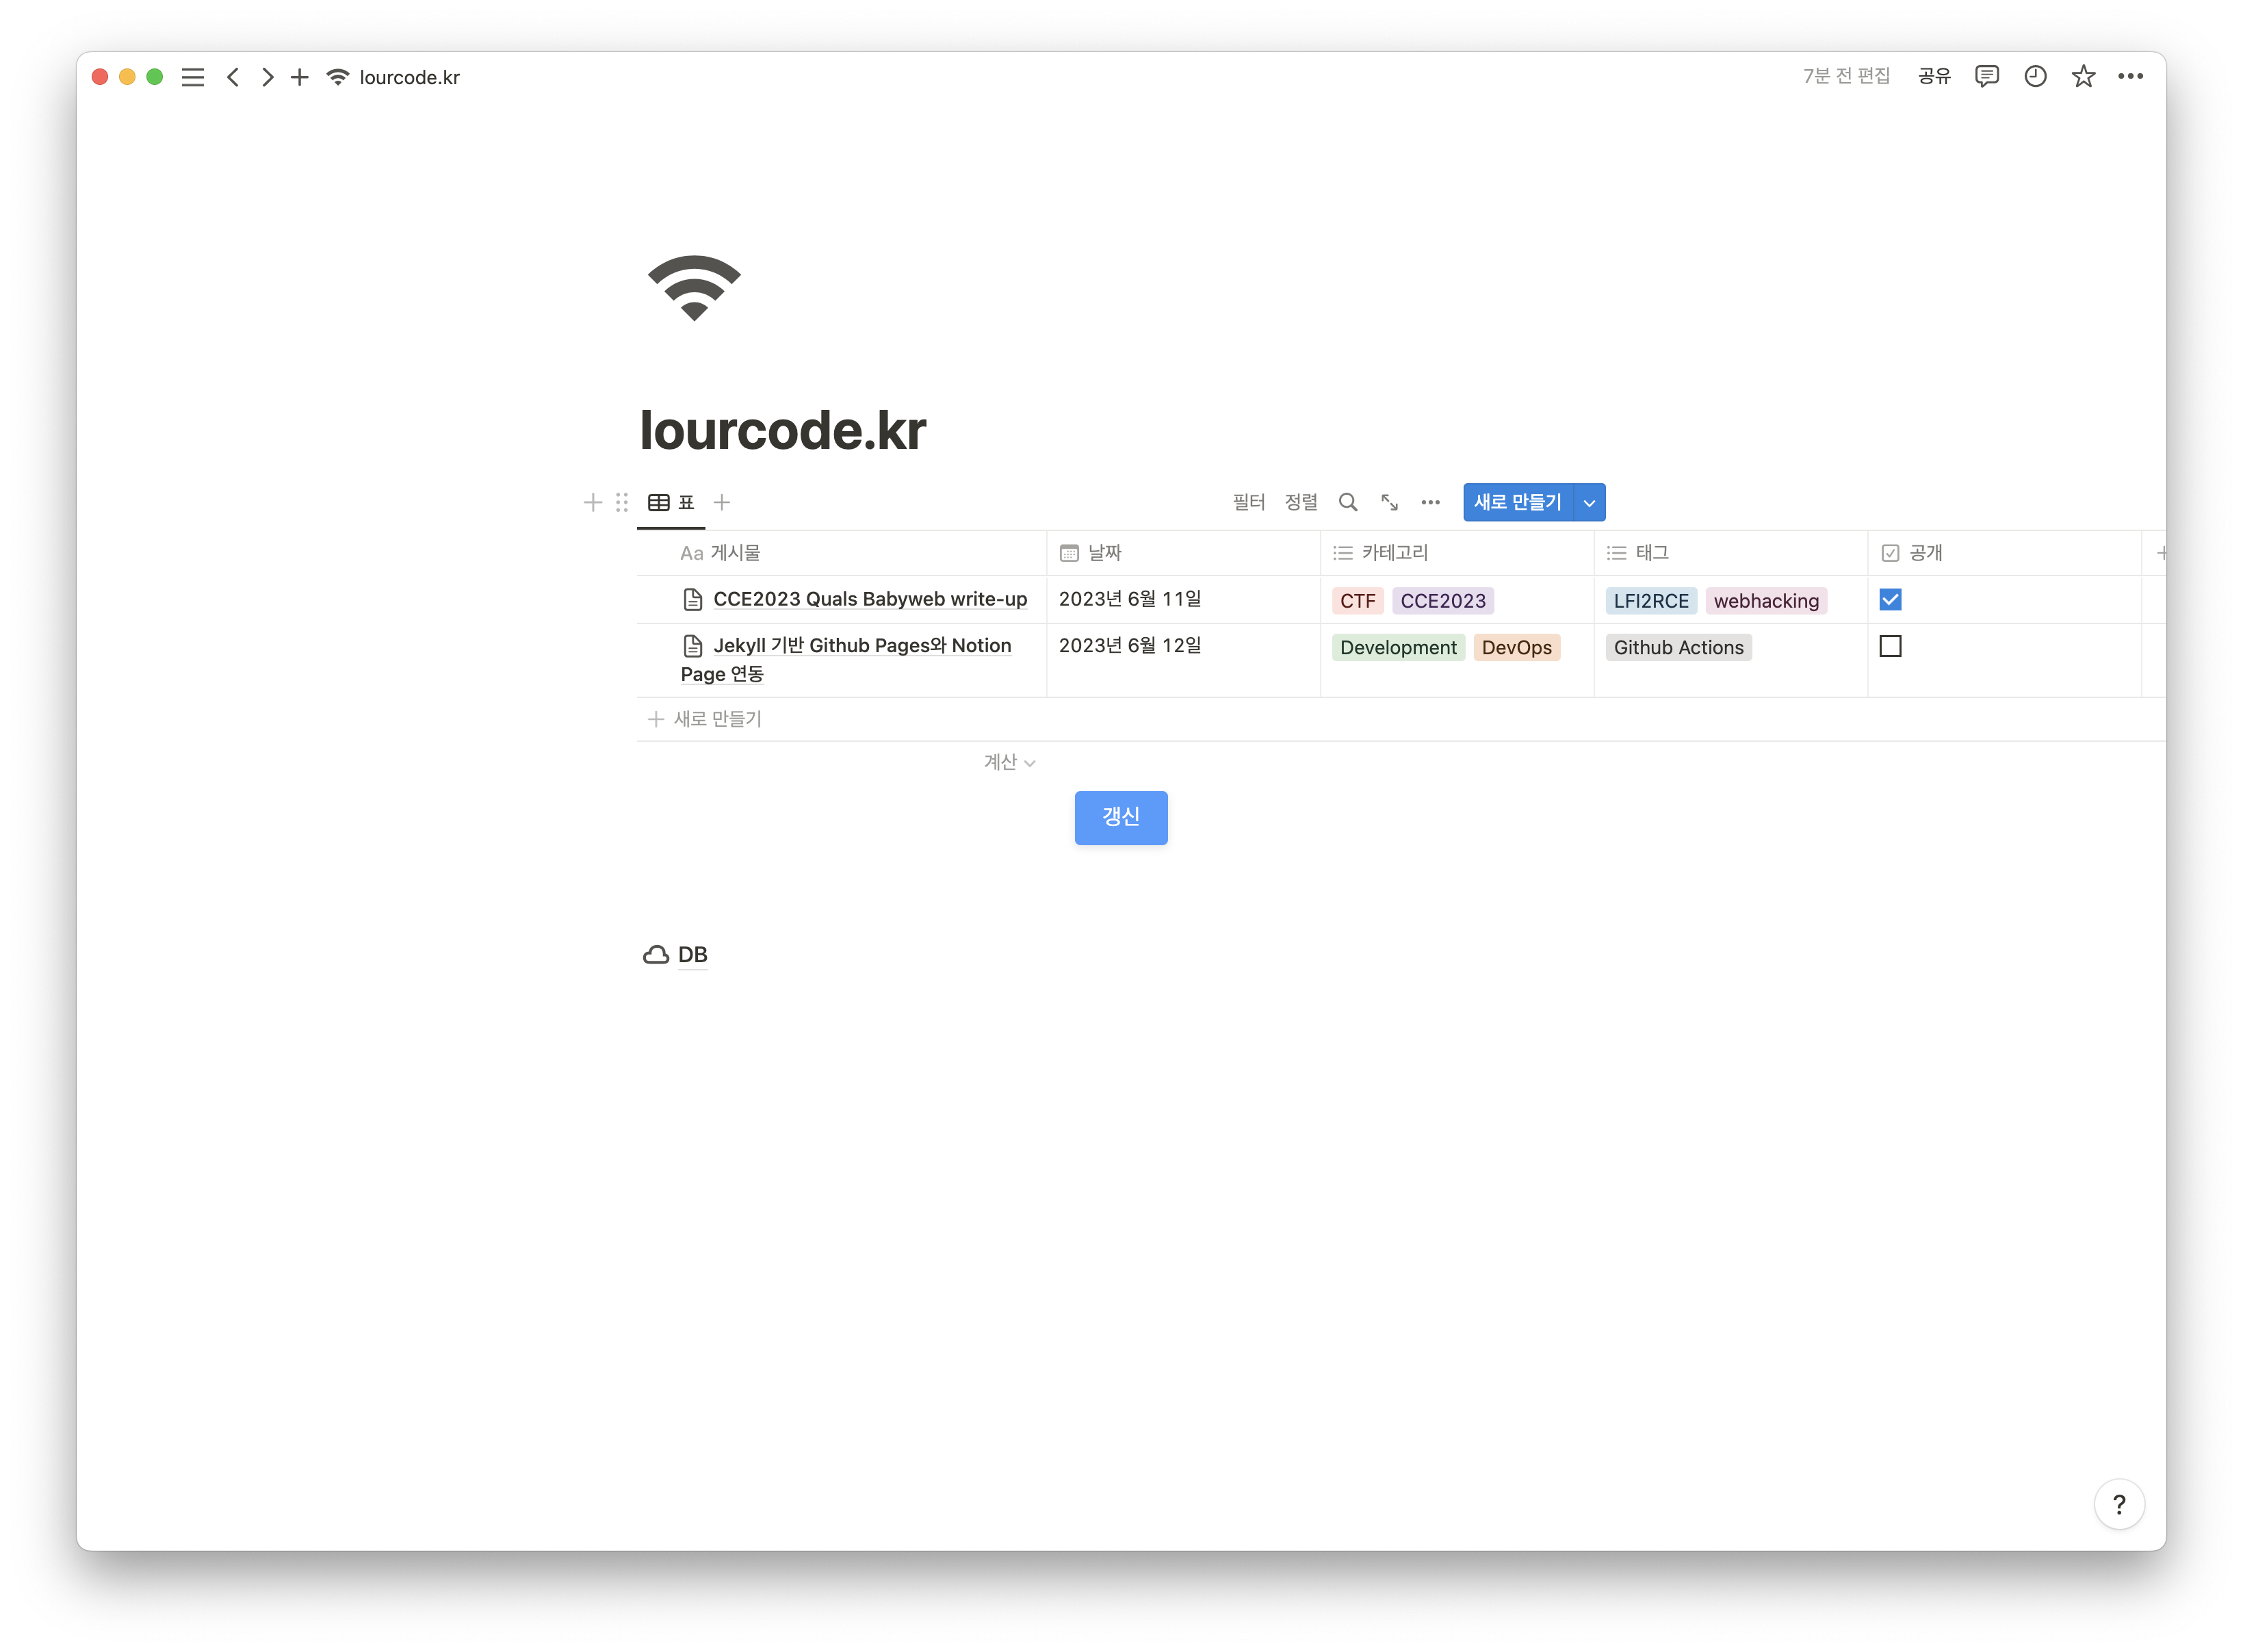
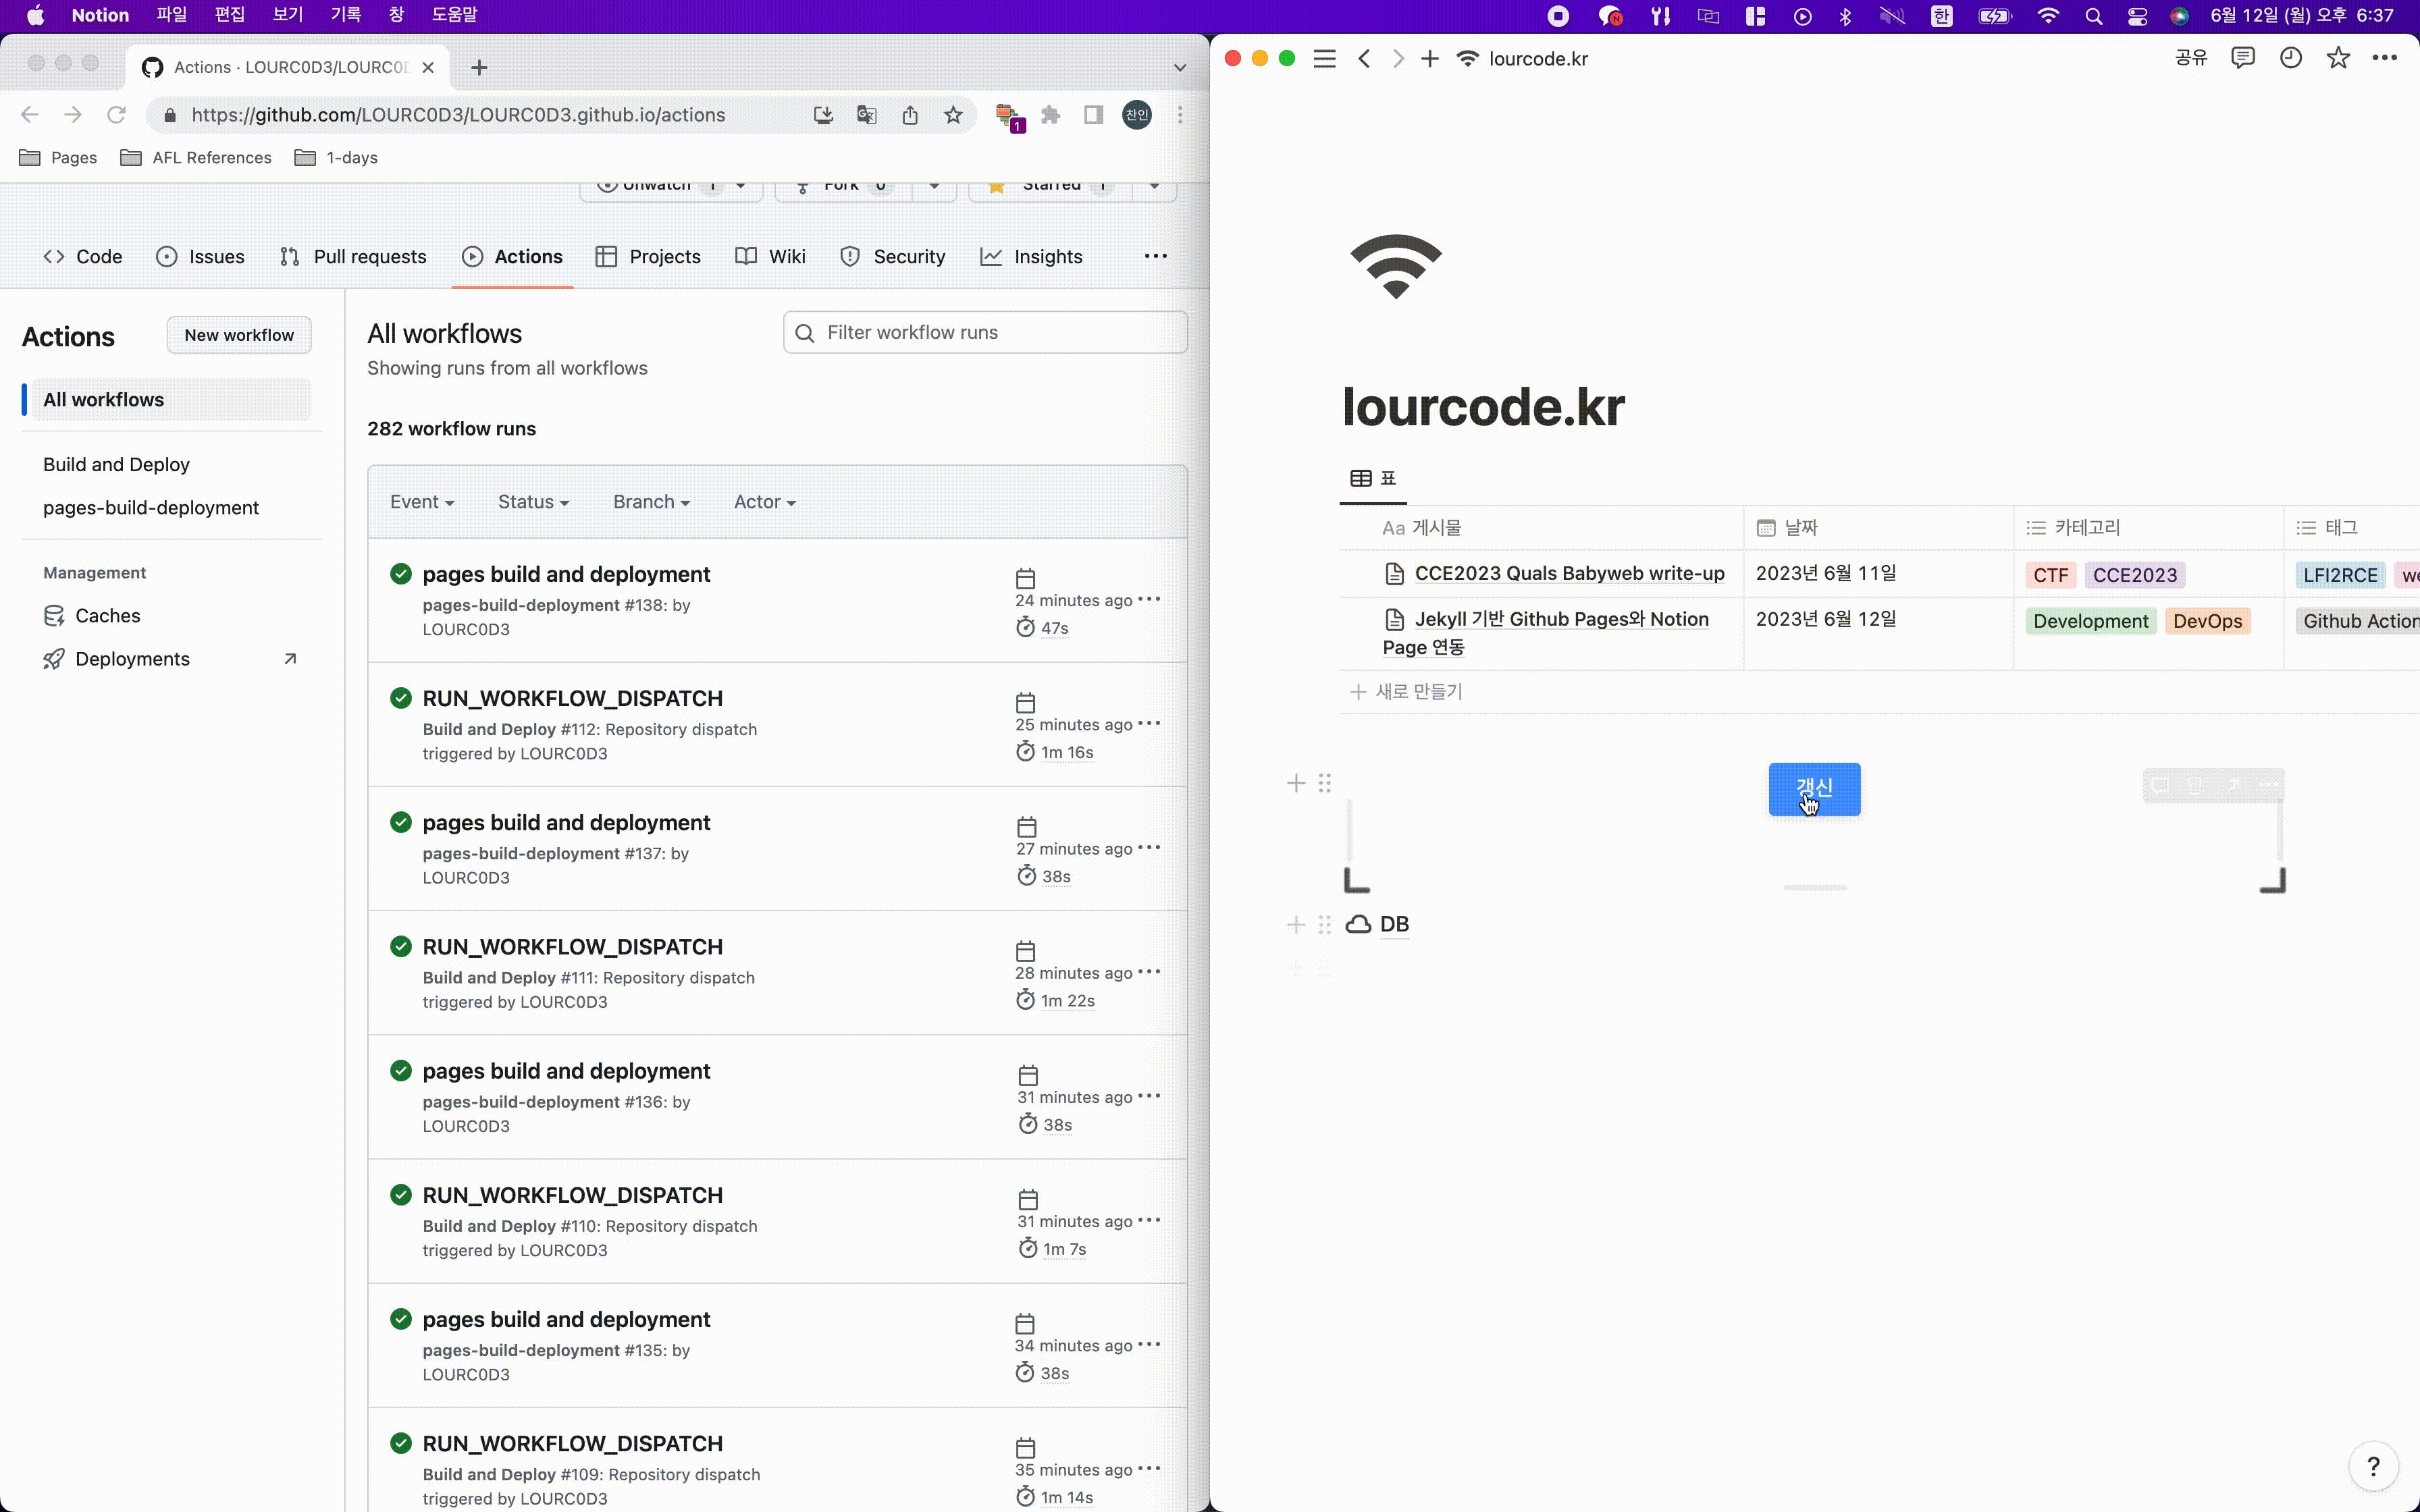
갱신 버튼을 눌러주는 것만으로 블로그에 글이 자동으로 등록된다.
이제 구현 방법에 대해 알아보자!
Notion 환경 설정
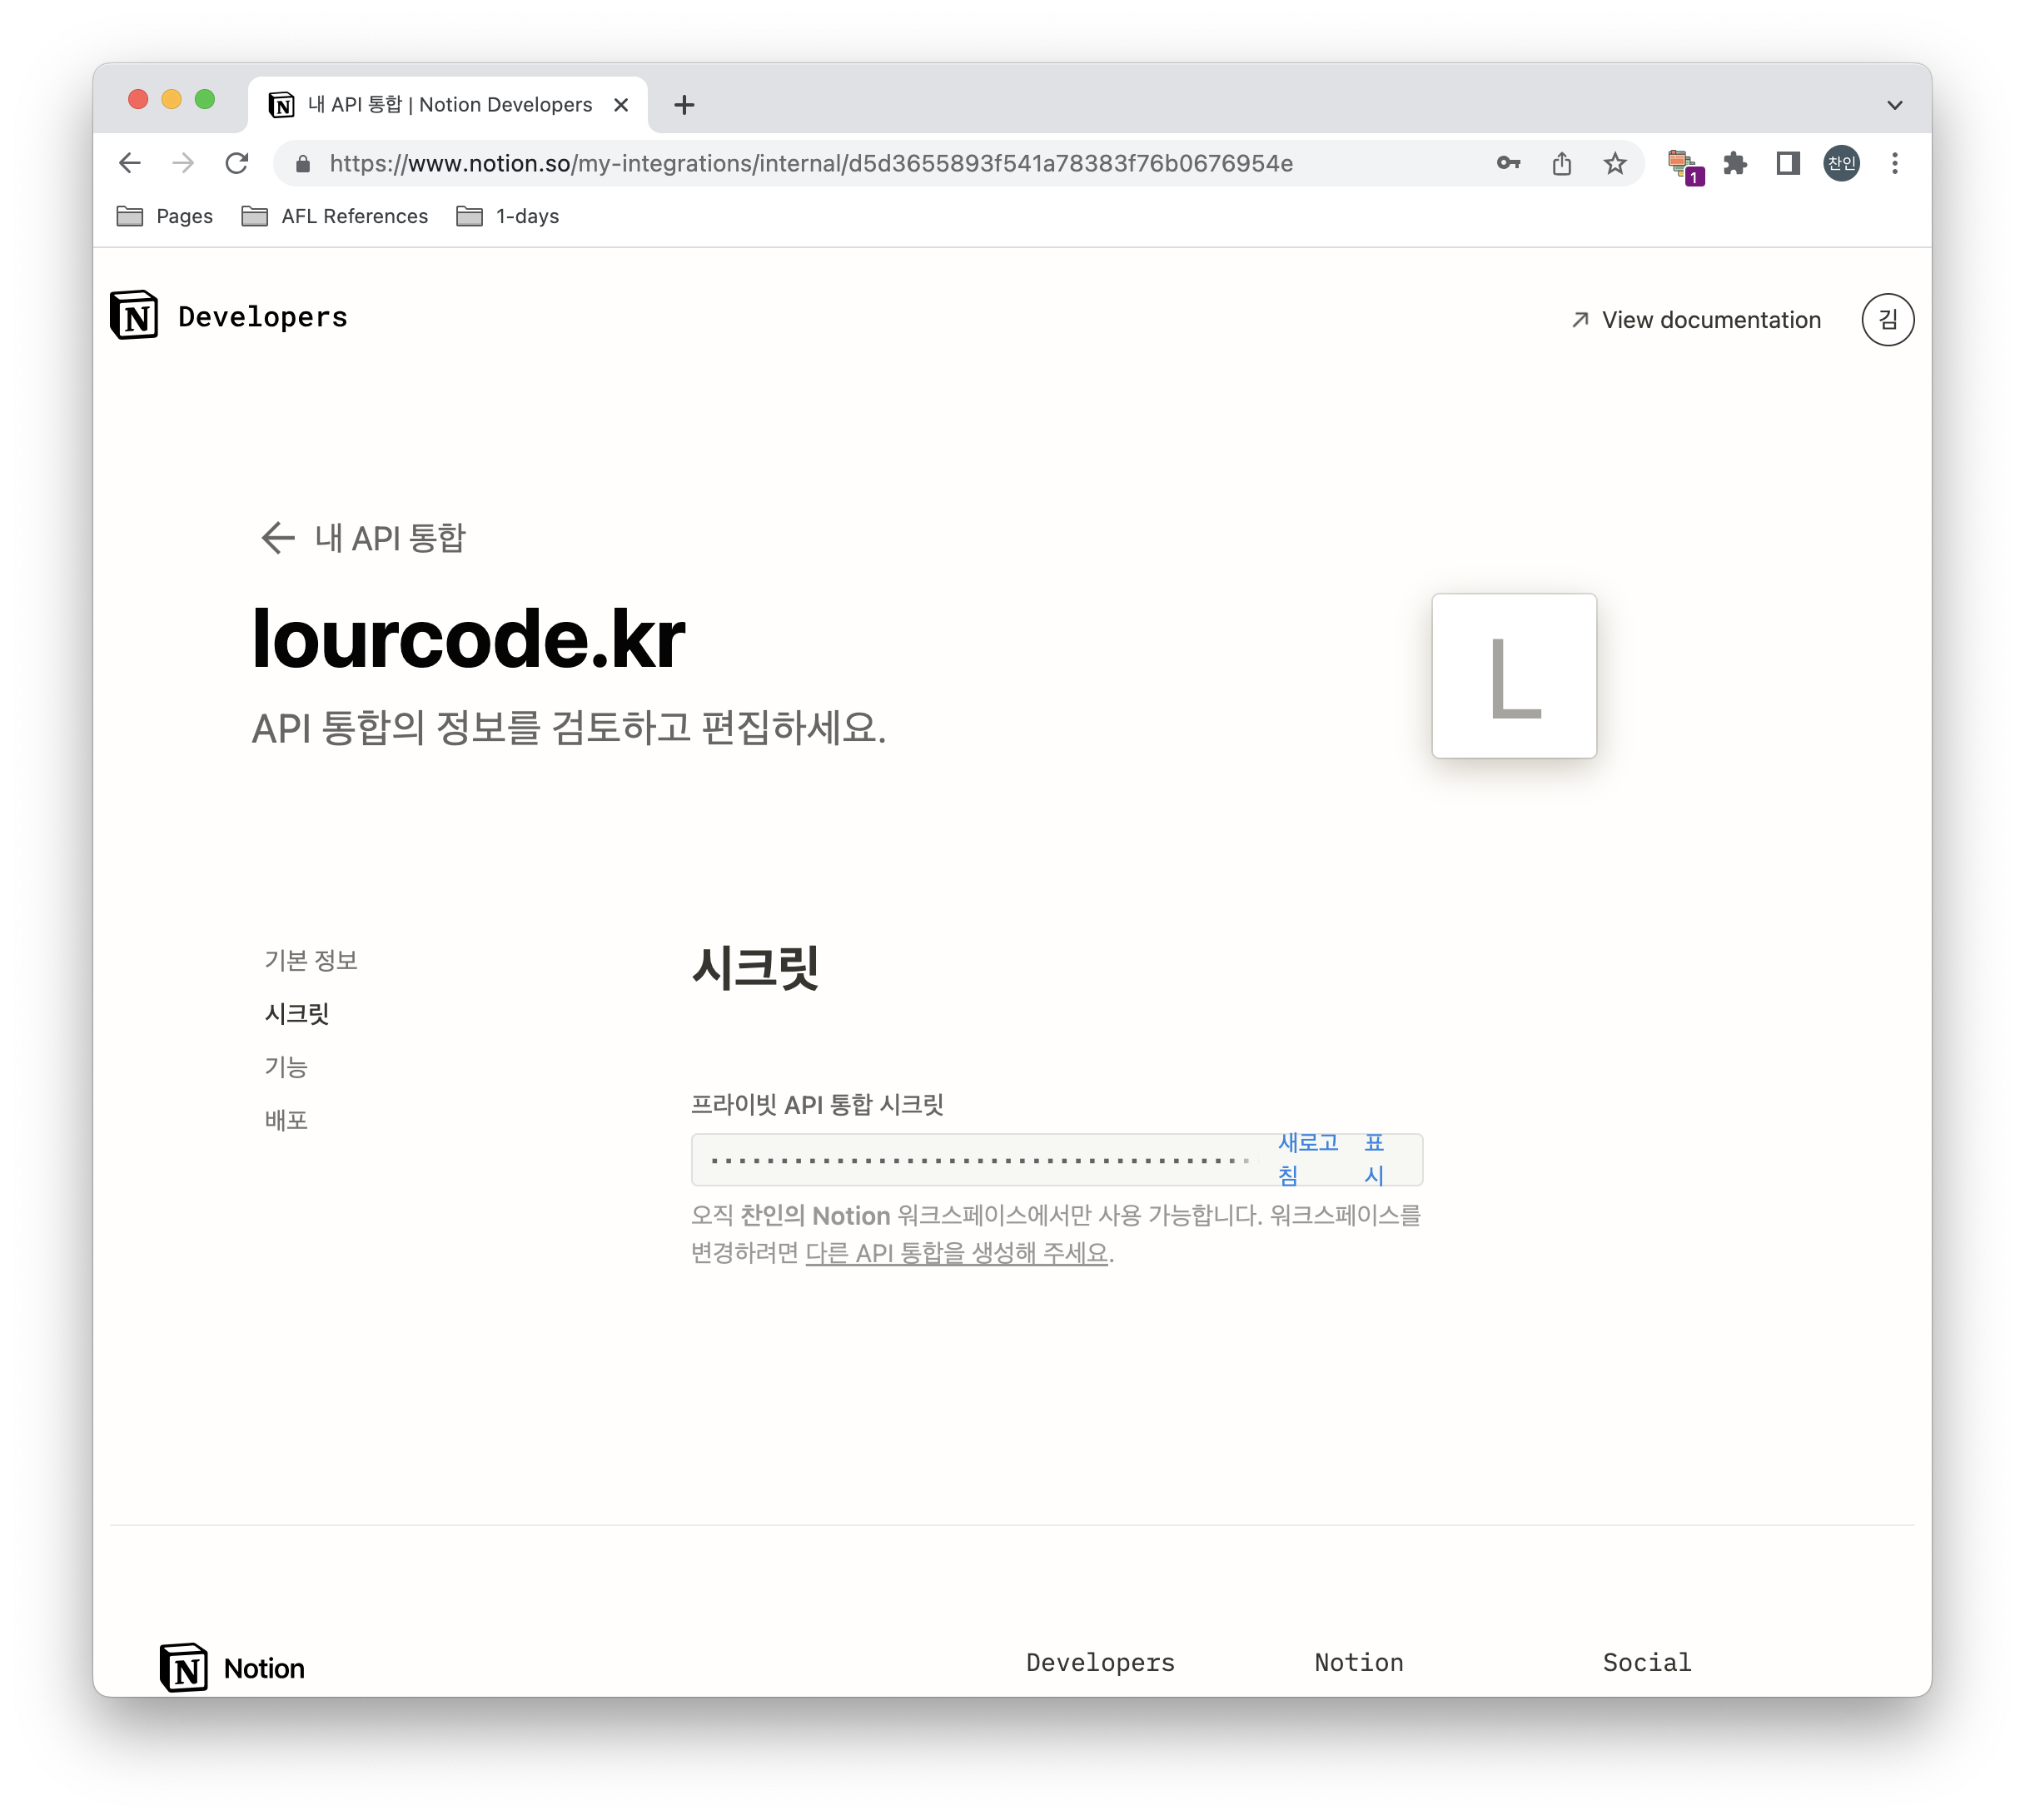
먼저, Notion에서 API 통합을 생성해주어야 한다.
아래의 링크에서 새 API 통합을 생성해준 후에 Secret 값을 안전한 곳에 보관한다.
https://www.notion.so/my-integrations
다음으로는 블로그 게시물을 작성할 페이지를 생성한다. 아래 템플릿을 사용하면 된다.
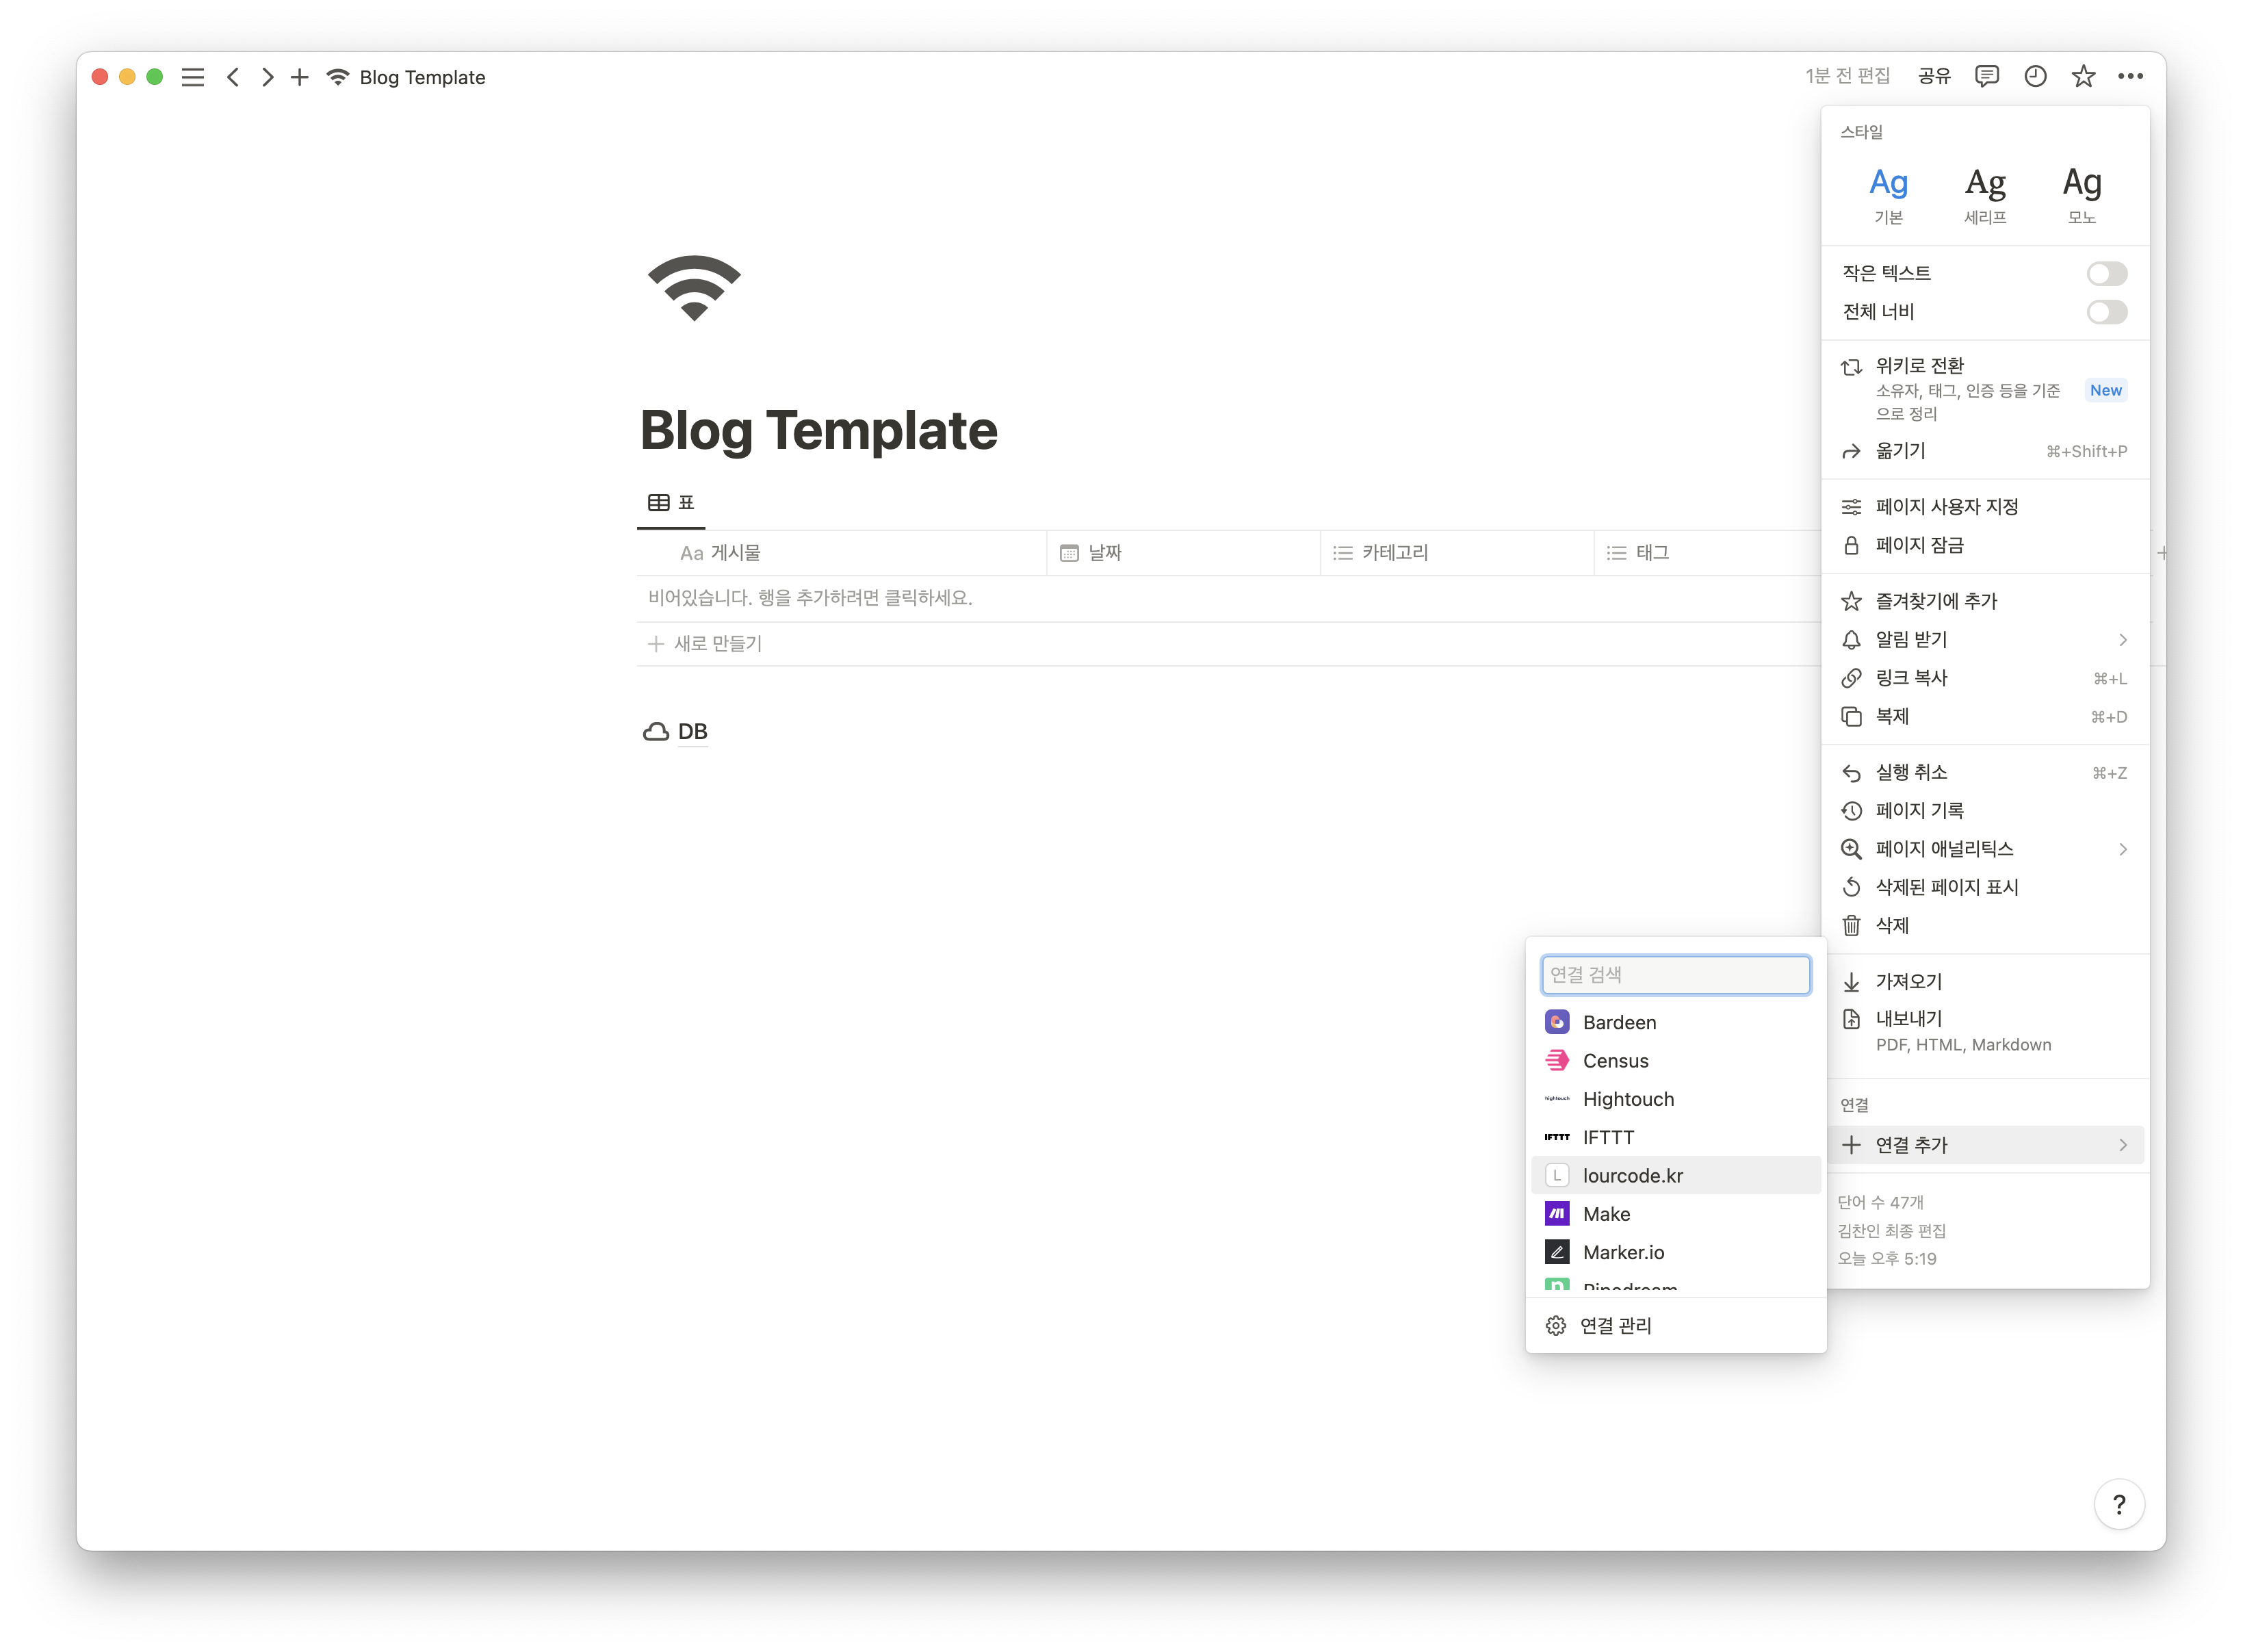
다음과 같이 생성했던 API 통합을 페이지에 추가해준다.
다음으로는 데이터베이스에 대한 ID를 알아야한다. 페이지 링크를 복사하면 데이터베이스 아이디를 구할 수 있다.
DB 페이지로 이동한 후 링크 복사를 눌러주면 아래와 같이 생긴 링크를 얻을 수 있다.
https://www.notion.so/<database_id>?v=<long_hash>
여기서 database_id를 안전한 곳에 보관해준다.
이제 Notion에서 해야 할 일은 모두 끝났다.
Github 환경 설정
먼저 환경 변수를 등록해주어야 한다. 아까 복사해둔 토큰들을 등록해주면 된다.
Key명은 다음과 같이 설정한다.

다음으로, workflow 파일과 Notion page 내용을 읽어오는 스크립트 총 두개를 추가해줘야 한다.
먼저, 스크립트 파일이다.
_scripts/notion-import.js
위 Javascript 파일에 대한 dependencies를 설치해준다.
package.json 위치에 생성하면 된다.
1
2
3
4
5
6
7
8
9
10
{
    "devDependencies": {
        "@notionhq/client": "^1.0.4",
        "@types/node-fetch": "^2.6.2",
        "moment": "^2.29.2",
        "node-fetch": "^2.6.7",
        "notion-to-md": "^2.5.5",
        "axios": "^1.4.0"
    }
}
다음은 workflow 파일이다.
배포 파일은 템플릿마다 다르므로 약간의 수정이 필요할 수 있다.
.github/workflows/pages-deploy.yml
1
2
3
4
5
6
7
8
9
10
11
12
13
14
15
16
17
18
19
20
21
22
23
24
25
26
27
28
29
30
31
32
33
34
35
36
37
38
39
40
41
42
43
44
45
46
47
48
49
50
51
52
53
54
55
56
57
58
59
60
61
62
63
64
65
66
67
68
69
70
71
72
73
74
75
76
77
78
79
80
81
82
83
84
85
86
87
88
89
90
91
92
93
94
95
96
97
98
99
100
101
102
name: "Build and Deploy"
on:
  repository_dispatch:
    types: [RUN_WORKFLOW_DISPATCH]

permissions:
  contents: write
  pages: write
  id-token: write

# Allow one concurrent deployment
concurrency:
  group: "pages"
  cancel-in-progress: true

jobs:
  importer:
    runs-on: ubuntu-latest

    steps:
      - uses: actions/checkout@master

      - name: Clean Directory
        run: |
          for file in assets/img/*
          do
              if [[ $file != "assets/img/favicons" ]]
              then
                  rm -rf "$file"
              fi
          done
          rm -rf _posts/*

      - uses: actions/setup-node@v3
        with:
          node-version: "17"

      - run: npm install

      - run: node _scripts/notion-import.js
        env:
          NOTION_TOKEN: ${{ secrets.NOTION_TOKEN }}
          DATABASE_ID: ${{ secrets.DATABASE_ID }}

      - uses: stefanzweifel/git-auto-commit-action@v4
        env:
          GITHUB_TOKEN: ${{ secrets.GITHUB_TOKEN }}
        with:
          commit_message: "[배포] Notion 변경 사항 저장"
          branch: main
          commit_user_name: importer-bot 🤖
          commit_user_email: [email protected]
          commit_author: importer-bot 🤖 <[email protected]>

  build:
    needs: importer
    runs-on: ubuntu-latest

    steps:
      - name: Checkout
        uses: actions/checkout@v3
        with:
          ref: main
          fetch-depth: 1
          # submodules: true
          # If using the 'assets' git submodule from Chirpy Starter, uncomment above
          # (See: https://github.com/cotes2020/chirpy-starter/tree/main/assets)

      - name: Setup Pages
        id: pages
        uses: actions/configure-pages@v1

      - name: Setup Ruby
        uses: ruby/setup-ruby@v1
        with:
          ruby-version: '3.1' # reads from a '.ruby-version' or '.tools-version' file if 'ruby-version' is omitted
          bundler-cache: true

      - name: Build site
        run: bundle exec jekyll b -d "_site${{ steps.pages.outputs.base_path }}"
        env:
          JEKYLL_ENV: "production"

      - name: Test site
        run: |
          bundle exec htmlproofer _site --disable-external --check-html --allow_hash_href

      - name: Upload site artifact
        uses: actions/upload-pages-artifact@v1
        with:
          path: "_site${{ steps.pages.outputs.base_path }}"

  deploy:
    environment:
      name: github-pages
      url: ${{ steps.deployment.outputs.page_url }}
    runs-on: ubuntu-latest
    needs: build
    steps:
      - name: Deploy to GitHub Pages
        id: deployment
        uses: actions/deploy-pages@v1
갱신 버튼 설정
블로그 글이 업데이트 되는 조건은 다음과 같다.
- disptach를 통해 워크플로우가 트리거 되었을 때
dispatch를 이용하면 버튼을 눌러서 게시글 업데이트를 진행할 수 있다.
먼저, Github AccessToken을 생성해주어야 한다.
Settings→Developer settings→Personal access tokens로 들어가서 새 토큰을 생성해준다.
scope는 repo, workflow, admin:repo_hook를 선택해준다.
이제 토큰을 안전한 곳에 복사해둔다.
Notion은 페이지를 임베딩 시킬 수 있으므로 웹 페이지를 통해 POST 메세지를 전송시킬 수 있다.
이러한 방법을 이용하여 dispatch를 실행시킬 수 있도록 구현했다.
아래 링크를 이용하면 HTML 코드를 GET 방식으로 전달할 수 있으므로 토큰 유출에 대한 걱정이 없다.
다만 확인해본 결과 로그를 수집하는 것 같아 새로 fork하여 관련 코드를 모두 삭제 하였다.
아래 링크에서 html 코드를 생성하고 그 아래 링크로 노션에 추가하면 된다.
다음과 같이 코드에서 USERNAME, REPO_NAME, GITHUB_ACCESS_TOKEN을 변경한 후 링크를 생성한다.
ACCESS_TOKEN은 위에서 생성한 토큰을 작성하면 된다.
1
2
3
4
5
6
7
8
9
10
11
12
13
14
15
16
17
18
19
20
21
22
23
24
25
26
27
28
29
30
31
32
33
34
35
36
37
38
39
40
41
42
43
44
45
46
47
48
49
50
51
52
53
54
55
56
57
58
59
60
61
62
63
64
65
66
67
68
69
70
<!DOCTYPE html>
<html>
<head>
  <meta charset="UTF-8">
  <style>
    .trigger-container {
      display: flex;
      flex-direction: column;
      align-items: center;
      text-align: center;
    }

    .trigger-button {
      display: inline-block;
      margin-bottom: 10px;
      padding: 10px 20px;
      background-color: #4c9aff;
      color: white;
      font-size: 16px;
      border: none;
      cursor: pointer;
      border-radius: 4px;
      box-shadow: 0px 2px 6px rgba(0, 0, 0, 0.1);
      transition: background-color 0.3s;
    }

    .trigger-button:hover {
      background-color: #2e86ff;
    }

    .message {
      font-size: 16px;
      color: #333;
    }
  </style>
</head>
<body>
  <div class="trigger-container">
    <button id="triggerButton" class="trigger-button">갱신</button>
    <div id="message" class="message"></div>
  </div>

  <script>
  document.getElementById("triggerButton").addEventListener("click", function() {
    var messageElement = document.getElementById("message");
    messageElement.textContent = "요청 전송 중...";

    var xhr = new XMLHttpRequest();
    xhr.open("POST", "https://api.github.com/repos/USERNAME/REPO_NAME/dispatches", true);
    xhr.setRequestHeader("Accept", "application/vnd.github.v3+json");
    xhr.setRequestHeader("Authorization", "Bearer GITHUB_ACCESS_TOKEN");
    xhr.setRequestHeader("Content-Type", "application/json");

    xhr.onload = function() {
      if (xhr.status === 204) {
        messageElement.textContent = "요청이 성공적으로 전송되었습니다." + xhr.status;
      } else {
        messageElement.textContent = "요청 전송에 실패했습니다.<br>상태 코드: " + xhr.status;
      }
    };

    xhr.onerror = function() {
      messageElement.textContent = "요청 전송 중 알 수 없는 오류가 발생했습니다.";
    };

    xhr.send(JSON.stringify({"event_type": "RUN_WORKFLOW_DISPATCH"}));
  });
</script>
</body>
</html>
이제 Notion 페이지에서 임베드를 통해 해당 링크를 연결한다.
여기까지 완료되면 버튼을 통해 블로그가 업데이트 되는 것을 확인할 수 있다!
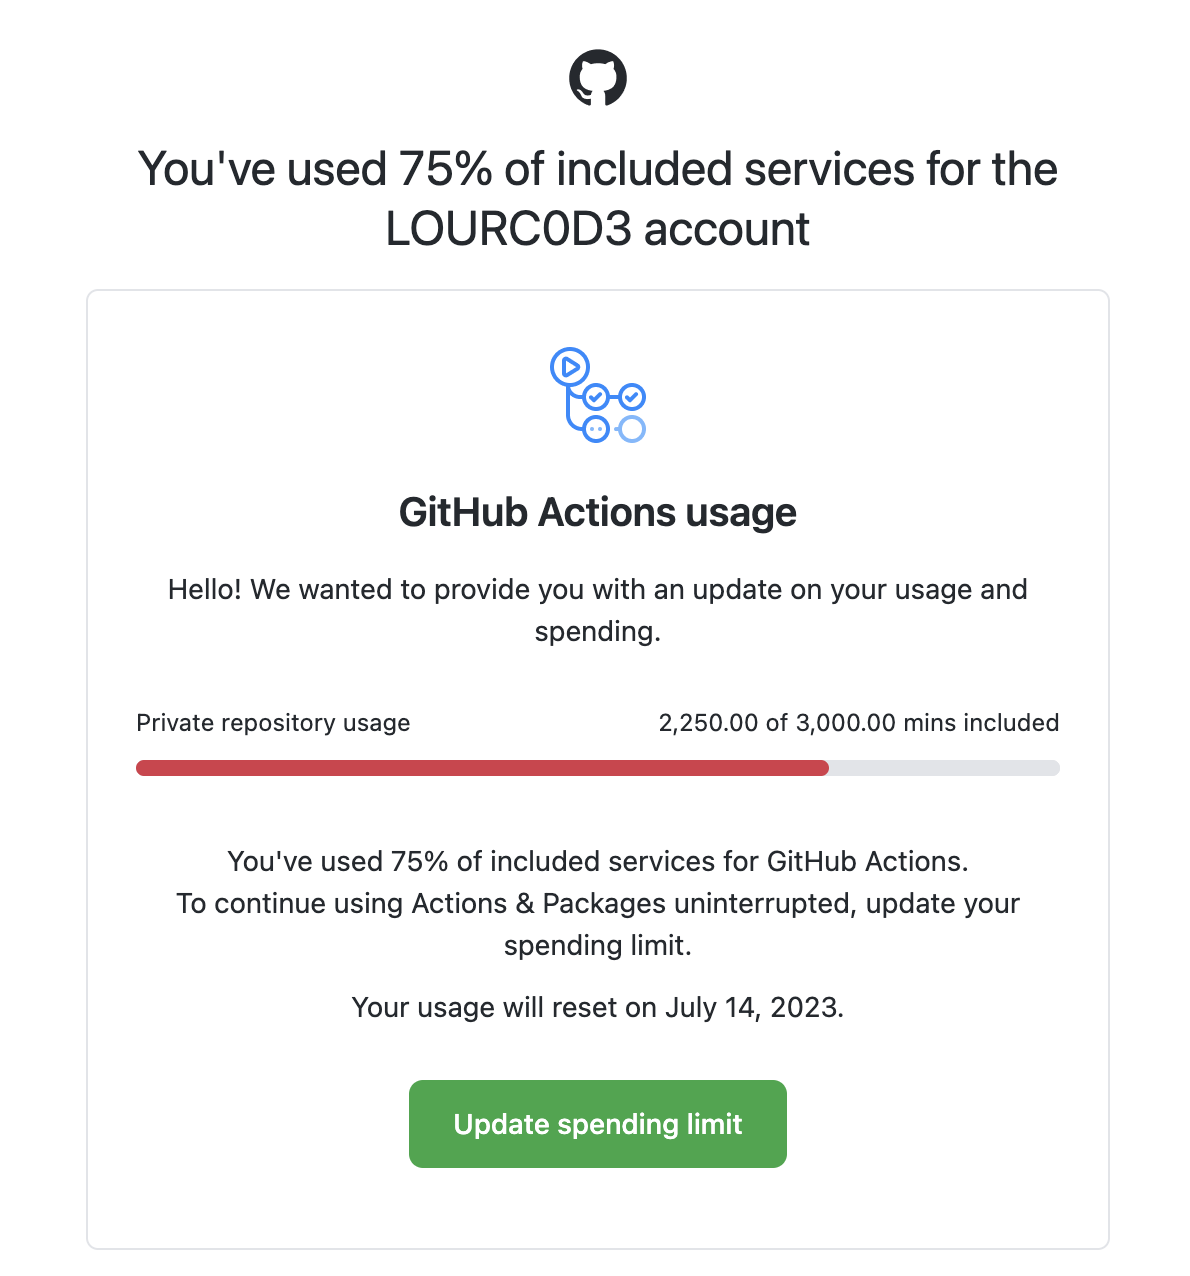
cron scheduler를 사용하지 않는 이유
원래는 업데이트 버튼과 cron scheduler를 이용하여 게시글 업데이트를 진행하였는데, 어느날 이런 메일이 도착했다.
우리는 게시글이 업데이트 될 때가 언제인지 알고 있기 때문에 cron scheduler가 필요없다고 판단하여 기능을 deprecation 하였다.
마무리
Github Actions를 이용하여 Notion과 Github pages를 통합해보았다.
Actions는 항상 많이 헷갈려서 오랜 시간 삽질하게 되는거 같다.
블로그 구축과 관련된 모든 코드는 아래 여기에 올려두었습니다.
또는 이 링크를 통해 초기 세팅이 완료된 레포지토리 템플릿을 이용하실 수 있습니다.
레퍼런스
- https://aymanbagabas.com/blog/2022/03/29/import-notion-pages-to-jekyll.html
업데이트 기록
- 이미지 업로드 문제 개선
- 1차 코드 블럭 이슈 개선
- 2024.05.07 2차 코드 블럭 이슈 개선
- 2024.05.07 Pagination 기능 통합